Caramel Apple Cheesecake Bites: Your New Favorite Fall Treat!
Hey there, friend! Anna here. Is there anything better than that first crisp, cool day of fall? The kind of day that makes you want to pull on your coziest sweater, put on a pot of tea, and fill your kitchen with the warm, spiced scent of baking apples and cinnamon? It’s pure magic, I tell you. And while I adore a classic apple pie or a whole, decadent cheesecake, sometimes you want all that cozy flavor without the commitment of slicing and serving a big dessert.
That’s where these little bites of heaven come in. Imagine this: a buttery, crunchy graham cracker crust, a layer of the creamiest, smoothest vanilla cheesecake, a spoonful of tender, cinnamon-spiced apples, and a glorious, gooey drizzle of rich caramel sauce. All of that flavor, packed into one perfect, pop-in-your-mouth bite. They’re the ultimate party pleaser, the star of any potluck, and the secret weapon for when you need a little “wow” factor with minimal fuss. No forks required, just pure, unadulterated joy. So, let’s tie on our aprons and turn these ordinary ingredients into something truly extraordinary together!
A Pie Pan Promise & The Birth of a Bite-Sized Dream
PrintCaramel Apple Cheesecake Bites

Creamy cheesecake, cinnamon-spiced apples, and buttery graham cracker crust come together in these irresistible mini bites. Drizzled with rich caramel, they’re a cozy, crowd-pleasing treat that tastes like fall in every bite—no fork required.
- Prep Time: 25 minutes
- chill: 2 hours
- Cook Time: 20 minutes
- Total Time: 2 hours 45 minutes
- Yield: 24 mini bites 1x
Ingredients
For the Crust:
1 cup graham cracker crumbs
2 tablespoons sugar
4 tablespoons unsalted butter, melted
For the Cheesecake:
16 oz cream cheese, softened
½ cup sugar
1 teaspoon vanilla extract
2 large eggs
For the Apple Topping:
1 cup peeled and finely diced apples (about 1 medium apple)
1 tablespoon butter
1 tablespoon brown sugar
½ teaspoon cinnamon
To Finish:
Caramel sauce, for drizzling
Instructions
Preheat oven to 325°F (160°C). Line a mini muffin tin with paper liners.
Mix crust ingredients and press a spoonful into each liner. Bake for 5 minutes.
Beat cream cheese and sugar until smooth. Add eggs and vanilla, mixing just until combined.
Pour cheesecake batter over crusts, filling each about ¾ full.
Bake 15–18 minutes, until set. Let cool completely, then chill for 2 hours.
Cook apples in butter, brown sugar, and cinnamon until soft and golden.
Top each cheesecake bite with apple mixture and a drizzle of caramel before serving.
Nutrition
- Calories: 160
- Sugar: 10g
- Sodium: 95mg
- Fat: 10g
- Saturated Fat: 6g
- Carbohydrates: 15g
- Cholesterol: 35mg
This recipe takes me right back to my grandma’s kitchen, with its checkered curtains and the ever-present smell of something sweet in the oven. Every fall, without fail, she would make her famous caramel apple pie. It was a two-day affair, involving homemade crusts, patiently reduced filling, and a caramel that she guarded like a state secret. I loved that pie, but more than that, I loved the ritual. I was her official “apple peeler” and “spice mixer,” jobs I took very seriously.
One year, I decided I was going to surprise her by making the pie all by myself. Well, let’s just say it was… a learning experience. The crust was a little tough, the apples were a little undercooked, and my caramel seized into a sugary rock. I was so disappointed, but Grandma just laughed her warm, full-belly laugh. She sat me down, handed me a fork, and said, “Anna, even the mistakes taste good when they’re made with love. Now, let’s scoop this delicious mess into bowls, add a big scoop of ice cream, and call it a ‘deconstructed caramel apple delight!’” It was a mess, but it was our mess, and we enjoyed every single bite. These cheesecake bites are my homage to her—all the incredible flavors of that memory, but in a fun, foolproof, shareable format that’s impossible to mess up. I think she’d approve.
Gathering Your Cozy Kitchen Crew: The Ingredients
Part of the joy of cooking is getting to know your ingredients! Here’s everything you’ll need to make these irresistible bites. I’ve included my best tips and tricks for each one to set you up for success.
For the Buttery Graham Cracker Crust:
- 1 cup graham cracker crumbs: You can buy these pre-crumbled, but I love blitzing whole sheets in my food processor for the freshest taste. Chef’s Insight: For a fun twist, try using ginger snaps or biscoff cookies instead!
- 2 tablespoons sugar: Just a little bit to sweeten the deal and help the crust crisp up nicely.
- 4 tablespoons unsalted butter, melted: This is the glue that holds our crust together. Using unsalted lets us control the salt level. Pro Tip: Make sure it’s properly melted, but not scalding hot.
For the Luxuriously Creamy Cheesecake Filling:
- 16 oz (two blocks) cream cheese, softened: This is non-negotiable, friends! Taking the time to let your cream cheese come to room temperature is the #1 secret to a silky-smooth filling without any lumps. I leave mine on the counter for at least 2 hours. Substitution Tip: Full-fat is best for texture, but you can use reduced-fat if you prefer. Avoid fat-free, as it won’t set properly.
- ½ cup sugar: This sweetens the filling perfectly without overpowering the tang of the cream cheese.
- 1 teaspoon vanilla extract: The supporting actor that makes all the other flavors sing. Use the real stuff if you have it!
- 2 large eggs: These give the cheesecake its structure and rich texture. Chef’s Hack: Crack them into a separate bowl first to avoid any rogue shell pieces in your beautiful batter.
For the Warm Cinnamon Apple Topping:
- 1 cup peeled and finely diced apples: I recommend a firm, tart apple that holds its shape when cooked, like Granny Smith or Honeycrisp. Pro Tip: Dice them small so they sit nicely on top of each bite!
- 1 tablespoon butter: For sautéing our apples to golden-brown perfection.
- 1 tablespoon brown sugar: Adds a deep, molasses-like sweetness that pairs perfectly with the apples.
- ½ teaspoon cinnamon: The quintessential fall spice! Feel free to add a pinch of nutmeg or allspice too.
The Grand Finale:
- Caramel sauce, for drizzling: Use a good-quality store-bought sauce to save time, or go all out and make your own! The drizzle at the end is what makes them truly irresistible.
Let’s Get Building: Step-by-Step Instructions
Ready to create some magic? Follow these steps, and you’ll have a tray of gorgeous mini cheesecakes in no time. I’m right here with you every step of the way!
Step 1: Prep Party! First things first, preheat your oven to 325°F (160°C). This ensures it’s perfectly heated and ready to go when your little bites are assembled. Then, line a mini muffin tin with paper liners. This is crucial for easy removal and a clean presentation. Trust me, you don’t want to skip this!
Step 2: Craft the Crust. In a medium bowl, combine your graham cracker crumbs and sugar. Give it a quick stir. Now, pour in that melted butter and mix until the mixture looks like wet sand and holds together when you pinch it. Chef’s Hack: I use a small spoon or a measuring tablespoon to portion the mixture into each liner. Then, I use a small shot glass or the back of a spoon to press it down firmly and evenly. This creates a solid base for our cheesecake. Pop the pan in the oven for 5 minutes. This “blind baking” step helps the crust stay crisp and not get soggy from the filling. Set it aside to cool slightly while you make the filling.
Step 3: Whip Up the Dreamy Filling. In a large bowl, beat your softened cream cheese and sugar together with an electric mixer on medium speed. Beat it for a good 2-3 minutes until it’s completely smooth and there isn’t a single lump in sight. Scrape down the sides of the bowl. Now, add the eggs one at a time, beating on low speed after each addition until they’re just incorporated. Finally, mix in the vanilla. Super Important Tip: Do NOT overmix once the eggs are in! Overbeating incorporates too much air, which can cause the cheesecakes to puff up and then crack as they cool. We want them dense, creamy, and crack-free.
Step 4: Fill ‘Er Up! Using a second spoon or a small cookie scoop, carefully pour the cheesecake batter over the par-baked crusts. Fill each liner about ¾ of the way full. They will puff up a little bit while baking, and this leaves just enough room for our apple topping later. A little mess is okay—we’re artists here!
Step 5: Bake to Perfection. Carefully transfer the muffin tin to your preheated oven. Bake for 15-18 minutes. You’ll know they’re done when the edges are set, but the centers still have a very slight jiggle—like Jell-O—when you gently shake the pan. They will continue to set as they cool. No peeking for the first 15 minutes! Let them cool completely in the pan on a wire rack. Then, the most critical step: refrigeration. Cover the pan with plastic wrap and chill for at least 2 hours, preferably longer. This patience is rewarded with the perfect creamy texture.
Step 6: The Spiced Apple Glory. While the cheesecakes are chilling, make your topping. In a small skillet over medium heat, melt the tablespoon of butter. Add your finely diced apples, brown sugar, and cinnamon. Cook, stirring occasionally, for about 5-7 minutes, until the apples have softened and the sauce is bubbly and fragrant. Let this cool completely before topping the cheesecakes. A warm topping will make the cheesecake weepy!
Step 7: The Grand Finale. Once everything is completely cool, it’s assembly time! Gently peel the paper liners off your chilled cheesecake bites. Place them on a serving platter. Top each one with a small spoonful of the cinnamon apple mixture. Then, take your caramel sauce and drizzle it over the top in a beautiful, decadent pattern. Get creative with it!
How to Serve These Mini Masterpieces
Presentation is part of the fun! I love arranging these bites on a beautiful rustic wooden board or a elegant white platter to make the colors of the apples and caramel really pop. They are the perfect finger food for a party. For a more decadent dessert, you could place one or two on a small plate with an extra drizzle of caramel and a tiny scoop of vanilla bean ice cream on the side. They also make a fantastic addition to a holiday dessert charcuterie board alongside some cookies and chocolate truffles. However you serve them, be prepared for recipe requests!
Make It Your Own: Delicious Variations
The beauty of this recipe is its versatility! Here are a few ways to mix it up:
- Pecan Praline Twist: Add a handful of finely chopped toasted pecans to the graham cracker crust. Then, sprinkle a few on top with the caramel for a praline effect.
- Salty-Sweet Sensation: Use a salted caramel sauce and finish each bite with a tiny flake of sea salt. It’s a game-changer.
- Chocolate Lover’s Dream: Substitute the graham cracker crumbs with chocolate wafer crumbs for a chocolate crust. You could even add a mini chocolate chip to the bottom of each cup before adding the filling.
- Pear & Ginger Swap: Not an apple fan? Try using finely diced ripe pears and add ¼ teaspoon of ground ginger to the topping for a sophisticated flavor profile.
- Gluten-Free Friendly: Simply use your favorite gluten-free graham crackers or cookies to make the crumbs for the crust. The rest of the recipe is naturally gluten-free!
Anna’s Chef Notes & Kitchen Stories
This recipe has been through a few iterations in my kitchen. The first time I made them, I got a little overzealous and filled the liners all the way to the top. Let’s just say I had a very unique “muffin-top” situation happening, and the cleanup was… memorable. Lesson learned: ¾ full is the sweet spot!
I also highly recommend making a double batch and freezing half of them (without the topping). They freeze beautifully! Just pop the un-topped cheesecake bites into a single layer in a freezer bag. When a craving hits, let them thaw in the fridge, then add your fresh apple topping and caramel. It’s like having a secret dessert weapon ready for any occasion. This recipe is a love letter to my grandma and to all of you who find joy in sharing food. I hope they bring as much happiness to your table as they do to mine.
Your Questions, Answered: FAQs & Troubleshooting
Q: My cheesecake filling sunk in the middle after baking. What happened?
A: Don’t worry, they’ll still taste amazing! This usually happens for one of two reasons: 1) The batter was overmixed after the eggs were added, incorporating too much air. Or 2) The oven temperature was too high, causing them to rise too quickly and then fall. Remember to mix on low once the eggs are in and ensure your oven is properly calibrated. The sunken middle is just a perfect little well for extra apple topping!
Q: Can I make these in a regular-sized muffin tin?
A: Absolutely! You absolutely can. Just note that they will be larger and the baking time will need to be increased. I’d start checking them at around 20-22 minutes for a standard muffin tin. The “jiggle” test is still your best indicator of doneness.
Q: Why is it so important for the cream cheese to be at room temperature?
A> This is the most common question I get for any cheesecake recipe! Cold cream cheese is stubborn and lumpy. No matter how long you beat it, it will never become perfectly smooth, and you’ll risk overbeating once you add the eggs to try and compensate. Room-temperature cream cheese blends into a lush, silky, dreamy base effortlessly. It’s the single biggest factor in achieving a professional texture.
Q: My caramel sauce is too thick to drizzle. How can I fix it?
A> Easy fix! If you’re using a store-bought jarred sauce, you can often microwave it for 10-15 seconds to loosen it up. If it’s homemade, a tiny splash of warm cream or milk stirred in will bring it back to a perfect drizzling consistency.
Nutritional Information (Per Bite)
Prep Time: 25 minutes | Cook Time: 20 minutes | Chill Time: 2 hours | Total Time: 2 hours 45 minutes | Servings: 24 mini bites
Calories: 160 | Fat: 10g | Saturated Fat: 6g | Cholesterol: 35mg | Sodium: 95mg | Carbohydrates: 15g | Sugars: 10g | Protein: 2g
Please note: This is an estimate provided for informational purposes only. Exact values can vary based on specific ingredients used.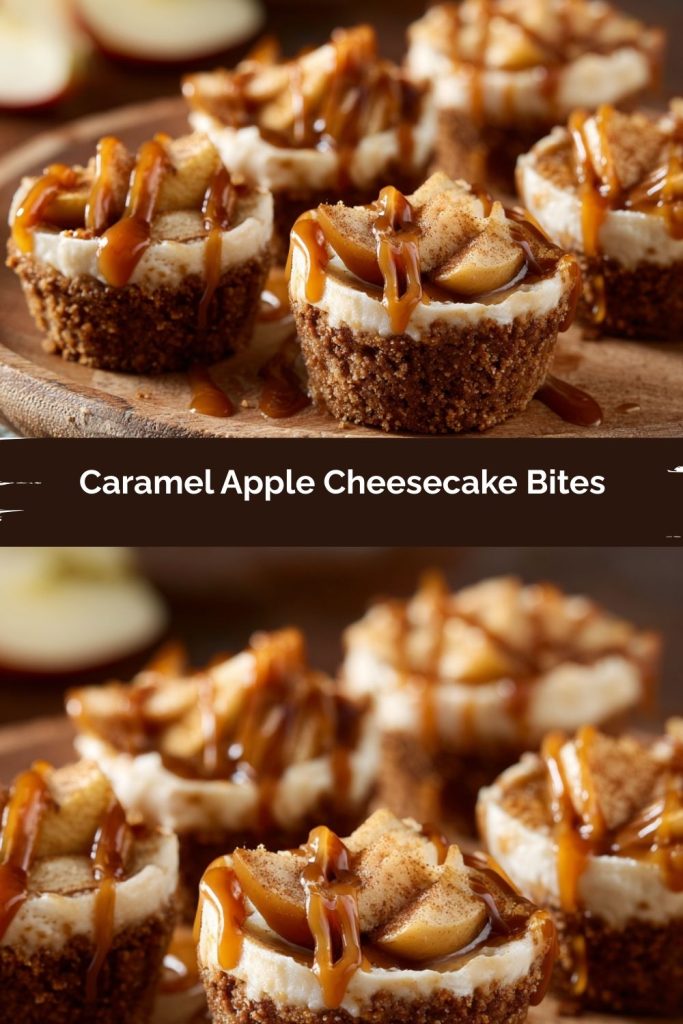
Final Thoughts
These Caramel Apple Cheesecake Bites are everything we love about fall desserts—rich, spiced, a little nostalgic, and perfectly shareable—all wrapped up in one bite-sized package. They capture the comfort of grandma’s apple pie and the indulgence of cheesecake, but with none of the fuss of slicing or serving.
Whether you’re baking them for a holiday spread, a cozy night in, or just because your kitchen deserves to smell like cinnamon and apples, these little gems deliver big on flavor and joy. Go ahead—make a batch (or two!) and let them become part of your own fall traditions.