***
Your New Favorite Bite-Sized Holiday Miracle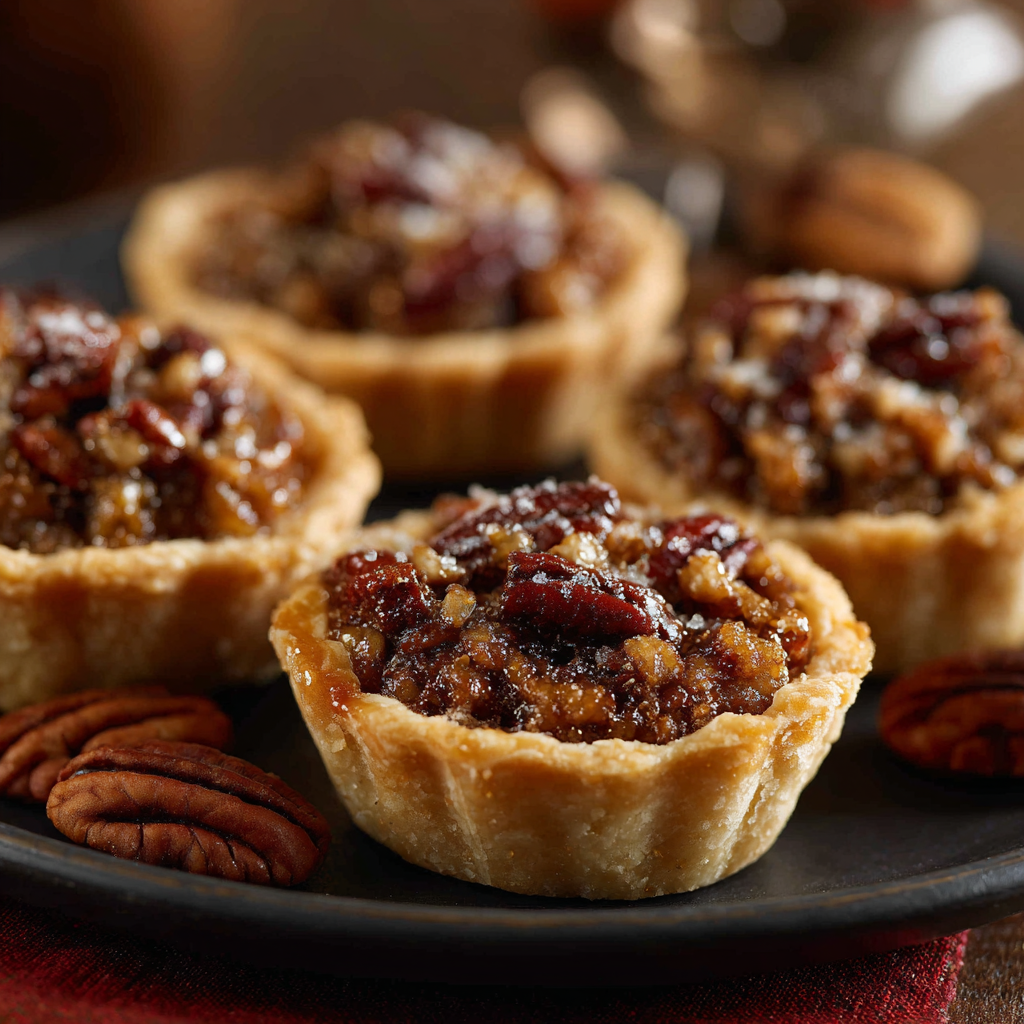
Hey there, friend! Can you smell it? That unmistakable, heavenly aroma of toasty pecans, rich caramel, and buttery pastry that seems to float through the air the moment November hits? It’s the scent of gatherings, of gratitude, and of pure, unadulterated joy. It’s the smell of pecan pie. But today, we’re not just making any pecan pie. Oh no. We’re taking all that magic and shrinking it down into the most irresistible, utterly poppable, absolutely perfect little treat: Mini Pecan Pie Tarts!
If you’ve ever been intimidated by the thought of making a full-sized pie—the fear of a soggy bottom, the anxiety of a messy slice—this is your moment to shine. These mini tarts are your secret weapon. They’re forgiving, fun to make, and guaranteed to bring a chorus of “oohs” and “aahs” from everyone who tries one. Imagine a crisp, flaky, melt-in-your-mouth crust cradling a warm, gooey, nutty filling that’s just the right amount of sweet. They’re perfect for holiday parties, cookie swaps, or just because you deserve a little homemade happiness today. So, tie on your favorite apron, put on some festive tunes, and let’s turn your kitchen into the coziest little bakery. We’re about to create some edible magic, one mini tart at a time.
A Pie Crust Promise
PrintMini Pecan Pie Tarts

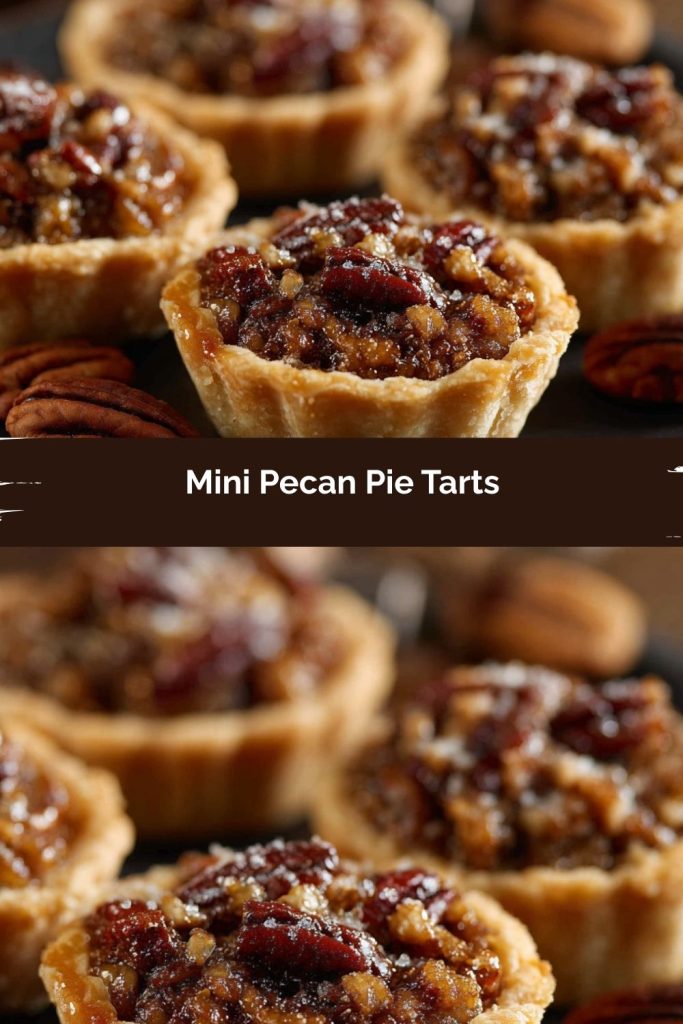
Everything you love about classic pecan pie—rich, gooey filling and toasted nuts—packed into crisp, buttery mini tart shells. These handheld delights are easy to make and perfect for holiday spreads, dessert tables, or sweet little moments any time of year.
- Prep Time: 30 minutes
- Cook Time: 25 minutes
- Total Time: 55 minutes
- Yield: 24 mini tarts 1x
Ingredients
For the Tart Shells:
1¼ cups all-purpose flour
2 tablespoons granulated sugar
½ teaspoon salt
½ cup unsalted butter, cold and cubed
2–3 tablespoons ice water
For the Filling:
¾ cup chopped pecans
½ cup corn syrup
½ cup brown sugar
2 tablespoons unsalted butter, melted
1 large egg
½ teaspoon vanilla extract
Pinch of salt
Instructions
Preheat oven to 350°F (175°C). Lightly grease a mini muffin tin.
To make crust, mix flour, sugar, and salt. Cut in butter until coarse crumbs form. Add water one tablespoon at a time until dough comes together.
Roll out dough and cut into small circles. Press into mini muffin cups to form shells.
In a bowl, combine all filling ingredients and stir well.
Spoon filling into each crust, about ¾ full.
Bake 20–25 minutes or until filling is set and crust is golden. Cool in pan before removing.
Nutrition
- Calories: 160
- Sugar: 12g
- Fat: 10g
- Carbohydrates: 17g
- Protein: 2g
- Cholesterol: 25mg
My love affair with pecan pie started not in a fancy restaurant, but on a wobbly step-stool in my Grandma Eleanor’s kitchen. I was her official “sprinkle of salt” adder and “stir slowly” reminder. She made a legendary pecan pie, the kind that had a designated “corner piece” fight at every family dinner. One year, tasked with bringing dessert to a massive potluck, I decided to tackle her famous recipe. But my confidence was… bigger than my pie-plate inventory. I only had one!
In a panic, I spotted a forgotten mini muffin tin hiding in the back of a cupboard. “What if…?” I thought. I used her exact filling, rolled her perfect flaky crust extra thin, and created a whole army of miniature versions. I was so nervous they wouldn’t live up to her legacy. But when we arrived, those little tarts disappeared faster than you could say “seconds, please!” They were the hit of the party. No slicing, no mess, just pure, handheld delight. That day, I learned a beautiful lesson: the best recipes aren’t just about tradition; they’re about adaptation, creativity, and sharing joy in whatever form it takes. These mini tarts are my happy little homage to Grandma Eleanor, and I know she’d absolutely approve.
Gathering Your Cozy Kitchen Crew
Here’s everything you’ll need to create these tiny wonders. The beauty of this recipe is in its simplicity—these are pantry staples that come together to create something truly special. Let’s break it down!
For the Tart Shells:
- 1¼ cups all-purpose flour: The foundation of our flaky crust. For a slightly more tender shell, you can swap in ¼ cup of cake flour, but all-purpose works perfectly.
- 2 tablespoons granulated sugar: Just a touch to lightly sweeten the crust and help it get that beautiful golden-brown color.
- ½ teaspoon salt: Non-negotiable, friend! It balances the sweetness and enhances all the other flavors. If you only have salted butter, just reduce this to a pinch.
- ½ cup unsalted butter, cold and cubed: The secret to a flaky crust is COLD butter. I pop mine in the freezer for 15 minutes before I start. The little pockets of steam created as it melts in the oven are what give us those perfect, delicate layers.
- 2–3 tablespoons ice water: The “ice” part is crucial! We want to hydrate the flour without melting the butter. Add it slowly—you might not need all of it.
For the Filling:
- ¾ cup chopped pecans: I like to use a mix of finely chopped and a few larger pieces for great texture. Toasting them first (just 5-7 minutes in a 350°F oven) is a GAME-CHANGER—it unlocks their deep, nutty flavor.
- ½ cup corn syrup: This is what gives the filling its classic gooey, glossy texture. I use light corn syrup, but dark corn syrup will work too for a deeper, almost molasses-like flavor. For a natural alternative, pure maple syrup is a fantastic swap!
- ½ cup packed brown sugar: Pack it firmly into your measuring cup! The molasses in the brown sugar adds a warm, caramel-like depth that white sugar just can’t match.
- 2 tablespoons unsalted butter, melted: This adds a rich, luxurious silkiness to the filling. Salted butter works fine here too.
- 1 large egg: Our binding agent! It gives the filling structure so it sets into a soft, sliceable consistency rather than a runny syrup. Make sure it’s at room temperature to blend smoothly.
- ½ teaspoon vanilla extract: The flavor booster. Use the real stuff if you can—it makes a world of difference.
- Pinch of salt: Again, this is our flavor superhero, cutting through the sweetness and making every component sing.
Let’s Build Some Bite-Sized Bliss!
Ready to get your hands a little dusty with flour? This process is so satisfying. Follow these steps, and you’ll be a mini tart master in no time.
- Preheat and Prep: First things first! Get that oven preheating to a cozy 350°F (175°C). This ensures it’s perfectly hot and ready when our little tarts are assembled. Now, grab your mini muffin tin and give it a very light coating of non-stick spray. This is our insurance policy for perfect, pop-outable tarts later. Trust me on this one!
- Create the Crust: In a medium bowl, whisk together your flour, sugar, and salt. Now, grab your cold, cubed butter. Using a pastry cutter, two forks, or even your fingertips, work the butter into the flour mixture. You’re looking for a texture that resembles coarse, sandy crumbs with a few pea-sized bits of butter still visible. Those butter bits are golden tickets to flakiness! Now, drizzle in your ice water, one tablespoon at a time, gently mixing with a fork after each addition. Stop adding water the moment the dough begins to clump together. Don’t overwork it! Turn the shaggy dough out onto a surface, gently form it into a disc, wrap it in plastic, and let it rest in the fridge for at least 30 minutes. This relaxes the gluten and re-chills the butter, making it easier to roll and ensuring a tender crust.
- Shape the Shells: On a lightly floured surface, roll your chilled dough out to about ⅛-inch thickness. Using a 2.5 to 3-inch round cutter (a glass or jar lid works in a pinch!), cut out as many circles as you can. Gently press each circle into a cup of your prepared muffin tin. Use your thumb to press the dough evenly up the sides. If you get a tear, no worries! Just patch it with a little scrap of dough. Prick the bottom of each shell once with a fork (this is called “docking” and prevents big air bubbles). Pop the whole tin back in the fridge for 10 minutes while you make the filling. This final chill is a pro move for extra crisp shells!
- Whisk the Filling: In a separate bowl, let’s make the magic happen. Combine the corn syrup, brown sugar, melted butter, room-temp egg, vanilla, and that all-important pinch of salt. Whisk it until it’s completely smooth and homogenous. No need for a mixer here, a little elbow grease does the trick. Now, stir in your chopped pecans. Give it a taste (chef’s perk!) and swoon.
- Fill ‘Em Up: Take your chilled tart shells out of the fridge. Give the filling one more stir, then spoon it carefully into each shell, filling them about ¾ of the way full. This leaves just enough room for the filling to puff up slightly without bubbling over. I like to place a few extra pecan halves on top of each one for a gorgeous, professional finish.
- Bake to Perfection: Slide your beautiful creations into the preheated oven and bake for 20-25 minutes. You’ll know they’re done when the edges of the crust are a light golden brown and the filling is set. It might still look a little jiggly in the very center—that’s okay! It will firm up as it cools. Resist the urge to overbake, or the filling can become rubbery.
- The Most Important Step: Cool! I know, the temptation is real. But you must let these little guys cool completely in the muffin tin on a wire rack. This allows the filling to set fully and makes them much, much easier to remove. I use a small offset spatula or a butter knife to gently coax them out once they’re completely cool. Patience, my friend, pays off with perfect tarts!
How to Serve These Shining Stars
Presentation is part of the fun! Arrange these gem-like tarts on a beautiful cake stand or a rustic wooden board for a stunning effect. They are divine all on their own, still slightly warm from the oven. But if you really want to take them over the top, a tiny dollop of freshly whipped cream or a small scoop of vanilla bean ice cream alongside is pure heaven. For a festive adult twist, offer a side of bourbon-spiked whipped cream. They also make the most thoughtful edible gift—package a few in a cute box lined with parchment paper for a present that’s guaranteed to be the most appreciated one at the party!
Make Them Your Own!
The fun doesn’t stop with the classic recipe. Here are a few of my favorite ways to mix it up:
- Chocolate Drizzle: Melt ¼ cup of chocolate chips with a teaspoon of coconut oil and drizzle it over the cooled tarts. Sea salt on top? Yes, please!
- Bourbon Pecan: Add 1-2 tablespoons of good bourbon to the filling for a wonderfully warm, complex flavor that adults will adore.
- Maple Kissed: Substitute the corn syrup with an equal amount of pure maple syrup for a rich, autumnal twist.
- Gluten-Free Friendly: Use a 1:1 gluten-free all-purpose flour blend for the crust. I’ve had great success with this swap!
- Cranberry Pecan: Fold 2-3 tablespoons of dried cranberries into the filling for a gorgeous and tangy burst of flavor.
From My Kitchen to Yours
This recipe has evolved so much since that first panicked potluck experiment! I’ve learned that the quality of your vanilla and the toast on your pecans are what separate a good tart from a truly unforgettable one. One time, I was filming a reel for these and was talking so much I completely forgot to add the sugar to the filling. Let’s just say I ended up with a very… savory… pecan tart situation. My husband, bless him, still ate one with a straight face and said, “It’s interesting, honey!” We still laugh about it. So if you have a kitchen mishap, welcome to the club! It’s all part of the story. The best part about these tarts is that they feel fancy, but they’re made with heart and a whole lot of love. That’s the real secret ingredient.
Your Questions, Answered!
Q: My filling bubbled over and made a mess! What happened?
A: Ah, the classic overflow! This usually means the shells were filled a bit too high. Remember, ¾ full is the sweet spot. Also, ensuring your oven is fully preheated helps the crust set quickly, containing the filling. A baking sheet placed on the rack below your muffin tin can catch any potential drips for easy cleanup.
Q: Can I make these ahead of time?
A: Absolutely! They are fantastic make-ahead treats. You have two options: 1) Bake them fully, let them cool completely, and store in an airtight container at room temp for 2 days or in the fridge for up to 5. They are delicious cold, or you can warm them gently in a 300°F oven for 5 minutes. 2) You can prep the unbaked tart shells in the muffin tin and the filling separately in the fridge up to 24 hours in advance. Assemble and bake right before you need them!
Q: My crust was tough, not flaky. Where did I go wrong?
A: This almost always comes down to overworking the dough. When you add the water, mix just until it comes together. When you form the disc and roll it out, handle it as little as possible. And those rest times in the fridge are not suggestions—they are essential for preventing gluten development and keeping the butter cold for maximum flakiness!
Q: The filling didn’t set and is runny. Help!
A> Don’t worry, we can fix this! First, ensure you baked them long enough—a toothpick inserted near the edge should come out relatively clean. If they are completely cool and still runny, they might be underbaked. You can pop them back in the oven for another 5-7 minutes. Also, double-check your measurements, especially the egg. That’s the key ingredient that makes the filling set.
Nutritional Information (Per Tart)
This is an approximate calculation and can vary based on specific ingredients used.
- Calories: 160
- Fat: 10g
- Saturated Fat: 4g
- Cholesterol: 25mg
- Sodium: 60mg
- Carbohydrates: 17g
- Sugars: 12g
- Protein: 2g
Prep Time: 30 minutes | Cook Time: 25 minutes | Total Time: 55 minutes | Servings: 24 mini tarts
 Final Thoughts
Mini Pecan Pie Tarts are proof that the best holiday desserts don’t have to be complicated to be unforgettable. With their flaky crust, gooey filling, and nutty crunch, they bring all the comfort of a classic pecan pie—just in a fun, fuss-free, bite-sized package.
Whether you’re serving them at Thanksgiving, gifting them to friends, or sneaking one with your morning coffee, these little gems are guaranteed to spread joy. They’re nostalgic, they’re adaptable, and most importantly, they’re made with love.
So dust off that muffin tin, toast those pecans, and let your kitchen smell like home. One bite, and you’ll see—these aren’t just mini desserts, they’re mini celebrations.