***
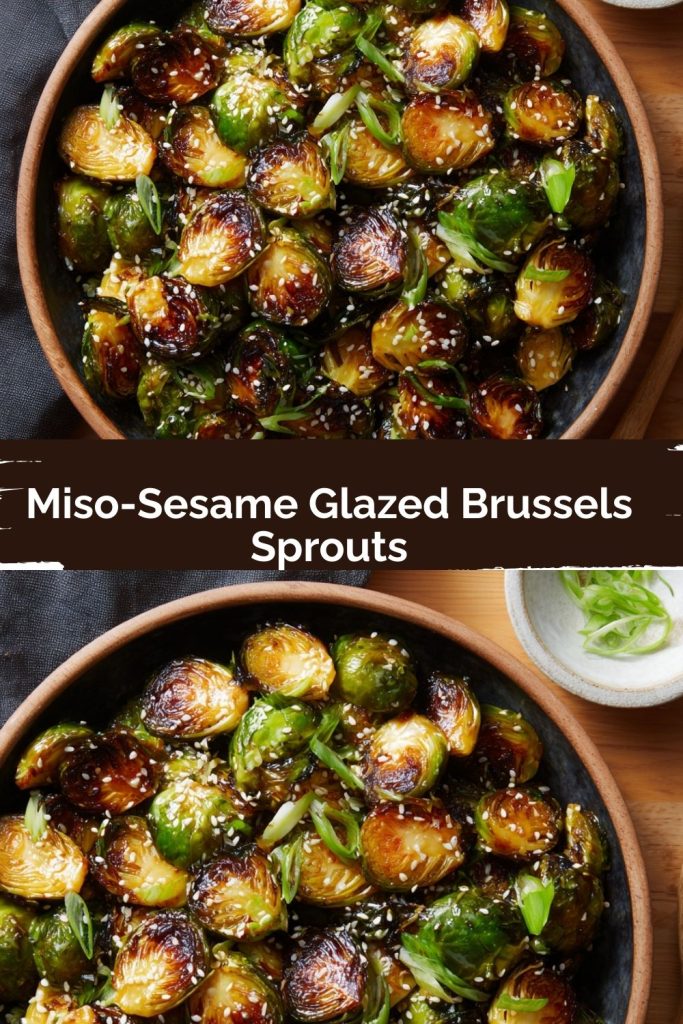
Miso-Sesame Glazed Brussels Sprouts: Your New Favorite Side Dish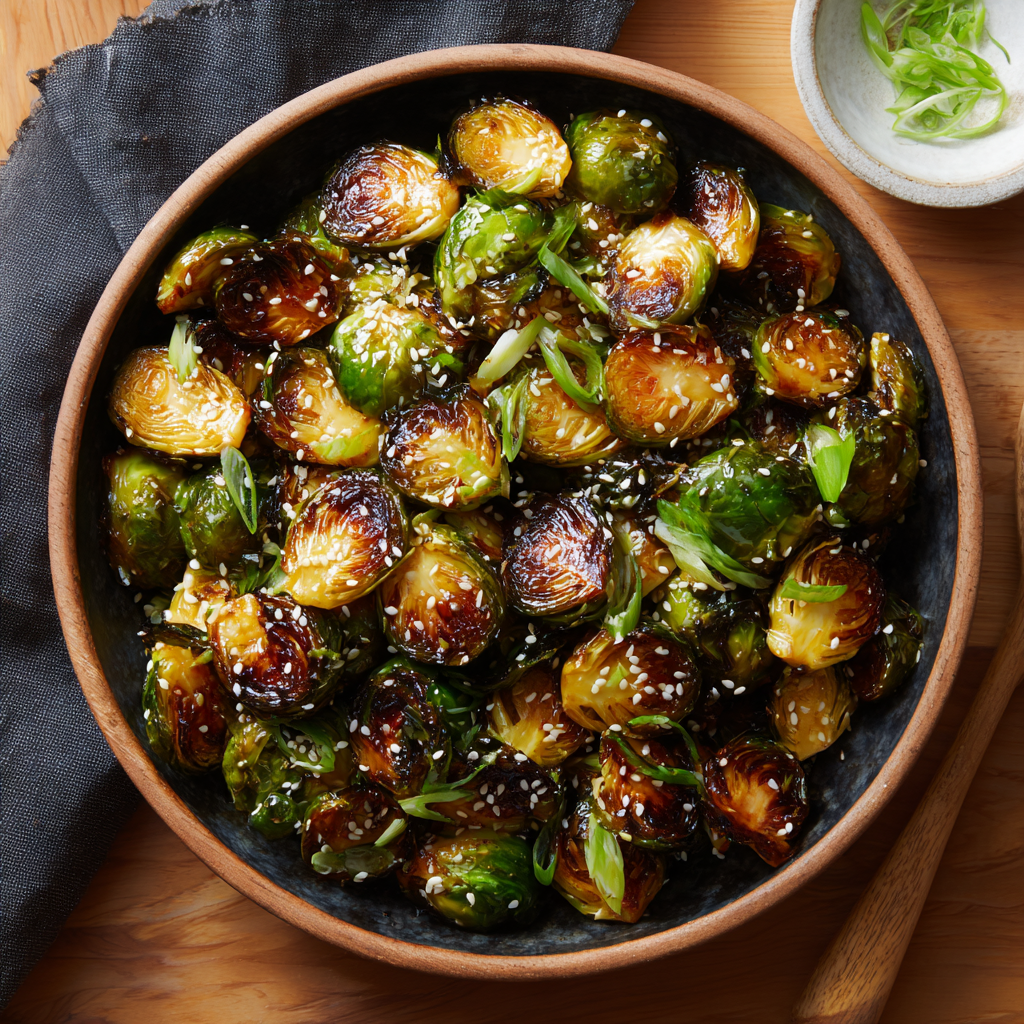
Hey there, friend! Let’s talk about Brussels sprouts. I know, I know. For some of you, that might bring back memories of sad, boiled, cabbagey-smelling mush that was the bane of your childhood dinners. But trust me on this—we’re about to enter a whole new world of sprout appreciation. The recipe we’re diving into today is a total game-changer. Imagine this: crispy, caramelized Brussels sprouts, roasted until their edges are shatteringly golden, then tossed in a sticky, savory, slightly sweet, and utterly addictive miso-sesame glaze. This isn’t just a side dish; it’s the side dish that guests will beg you for the recipe of, the one that might just upstage the main course, and the one that will have you sneaking bites straight from the pan.
This dish is a beautiful marriage of simple technique and powerhouse flavors. The magic happens in a hot oven, where the sprouts transform into little crispy nuggets of joy. Then, we coat them in a glossy, umami-rich glaze made with miso, soy, and a hint of maple that caramelizes into a flavor bomb. It’s the kind of recipe that feels fancy and restaurant-worthy but is honestly so straightforward to make. Whether you’re a sprout skeptic or a lifelong fan, this recipe is designed to bring joy, flavor, and a serious dose of deliciousness to your table. So, preheat that oven, grab your favorite bowl for tossing, and let’s turn these humble little cabbages into something truly magical together!
A Sprout Revelation: My Love Story with Brussels
PrintMiso-Sesame Glazed Brussels Sprouts

Crispy, caramelized Brussels sprouts get a major flavor upgrade with a sticky miso-sesame glaze. Roasted until golden and finished with a punchy umami-rich sauce, these sprouts are savory, slightly sweet, and absolutely addictive. A modern side dish that steals the spotlight.
- Prep Time: 10 min
- Cook Time: 25–30 min
- Total Time: 35–40 min
- Yield: 4–6 1x
Ingredients
1½ lbs Brussels sprouts, trimmed and halved
2 tbsp olive oil
Salt and pepper, to taste
For the Glaze:
1 tbsp white miso paste
1 tbsp soy sauce
1 tbsp maple syrup or honey
1 tbsp rice vinegar
1 tsp sesame oil
1 tsp grated fresh ginger (optional)
Topping (optional):
Toasted sesame seeds
Chopped scallions
Instructions
Roast the sprouts: Preheat oven to 425°F (220°C). Toss Brussels sprouts with olive oil, salt, and pepper. Roast cut side down for 20–25 minutes until deeply golden and crisp.
Make the glaze: In a small bowl, whisk together miso, soy sauce, maple syrup, rice vinegar, sesame oil, and ginger.
Glaze & return to oven: Drizzle glaze over hot sprouts, toss to coat, then roast 3–5 minutes more to set the glaze.
Finish: Sprinkle with sesame seeds and scallions before serving.
Nutrition
- Calories: 140
- Sugar: 5g
- Fat: 8g
- Carbohydrates: 14g
- Protein: 4g
My own journey with Brussels sprouts wasn’t exactly love at first bite. For years, I politely avoided them, convinced they were just not my thing. That all changed one chilly autumn evening at a tiny, bustling farm-to-table restaurant. A friend insisted I try the miso-glazed Brussels sprouts they were famous for. I was skeptical, but one bite was all it took. They were crispy, salty, sweet, and deeply savory—nothing like the soggy versions of my past. It was a full-blown culinary revelation!
I became obsessed, determined to recreate that magic at home. After what felt like a hundred batches (my family were very patient taste-testers!), I finally landed on this perfect formula. Now, these glazed sprouts are a non-negotiable part of our holiday table and a regular star in our weeknight dinner rotation. They remind me that sometimes, the best things in life are just a second chance and a hot oven away. This recipe is my attempt to share that “aha!” moment with you—to give you a reason to fall in love with sprouts, too.
Gathering Your Flavor Powerhouses
Part of the joy of this recipe is how a short list of simple ingredients comes together to create something spectacular. Here’s what you’ll need:
- 1½ lbs Brussels sprouts, trimmed and halved: Look for firm, bright green sprouts that are similar in size for even cooking. Don’t toss the loose leaves that fall off while trimming—they get super crispy and delicious in the oven!
- 2 tbsp olive oil: Our trusty cooking fat that helps conduct heat and promotes that beautiful, crispy caramelization. Avocado oil works great here too for its high smoke point.
- Salt and pepper, to taste: The essential flavor foundations. Don’t be shy! Seasoning at this first stage is key.
For the Glaze:
- 1 tbsp white miso paste: This is the secret weapon! Miso is a fermented soybean paste that packs a serious punch of savory, salty, complex umami flavor. Chef’s Insight: If you’re new to miso, find it in the refrigerated section near the tofu. It lasts forever in the fridge! For a gluten-free option, ensure your miso is marked as such (many are).
- 1 tbsp soy sauce: Adds depth and saltiness. For a gluten-free swap, tamari or coconut aminos are perfect substitutes.
- 1 tbsp maple syrup or honey: A touch of natural sweetness to balance the salty, savory notes and help the glaze caramelize. Agave syrup works too!
- 1 tbsp rice vinegar: This is our bright, acidic counterpoint that cuts through the richness and keeps the glaze from being too cloying. A little squeeze of fresh lime juice can work in a pinch.
- 1 tsp sesame oil: Use the toasted kind! It’s incredibly fragrant and delivers that classic, nutty sesame flavor. A little goes a long way.
- 1 tsp grated fresh ginger (optional): I highly recommend it! The fresh zing of ginger adds another layer of complexity and brightness. If you don’t have fresh, ¼ tsp of ground ginger can work, but the flavor will be more subtle.
Topping (optional, but highly encouraged!):
- Toasted sesame seeds: For crunch and visual appeal.
- Chopped scallions: A fresh, oniony finish that makes the whole dish pop.
Let’s Get Cooking: Building Layers of Flavor
Ready to make some kitchen magic? Follow these steps for perfectly crispy, glazed sprouts every single time.
Step 1: Preheat and Prep. Crank your oven to 425°F (220°C). This high heat is non-negotiable—it’s what gives us those beautifully browned, crispy edges and tender insides. While it heats up, wash your Brussels sprouts, trim off the dry stem ends, and slice them in half from top to bottom. As you do this, don’t discard any outer leaves that fall away! Toss them right in with the halved sprouts—they’ll become delightfully crispy, almost like little sprout chips.
Step 2: Season and Toss. Pile your prepped sprouts onto a large, rimmed baking sheet. Drizzle them with the olive oil and sprinkle generously with salt and pepper. Now, get your hands in there! Toss everything together until every single sprout half and loose leaf is glistening with oil. This hands-on method ensures maximum, even coverage. Chef’s Hack: For the crispiest results, make sure your baking sheet isn’t overcrowded. If the sprouts are piled on top of each other, they’ll steam instead of roast. If your sheet seems packed, use two! They need their personal space to get crispy.
Step 3: The First Roast – Crispy Foundations. Arrange all the sprouts so they are cut-side down on the baking sheet. This is another little chef secret! The flat cut side has more surface area to make direct contact with the hot pan, leading to superior browning and a fantastic crispy texture. Roast for 20-25 minutes. You’ll know they’re ready when the cut sides are a deep, golden brown and the outer leaves are dark and crackly. Your kitchen should smell amazing right now.
Step 4: Whisk the Magical Glaze. While the sprouts are roasting, let’s make the glaze. In a small bowl, add the miso paste, soy sauce, maple syrup, and rice vinegar. Whisk, whisk, whisk until the miso is completely dissolved and the mixture is smooth. Then, whisk in the sesame oil and grated ginger (if using). Pro Tip: If your miso is particularly thick and cold, you can pop the bowl in the microwave for 10 seconds to loosen it up, making it much easier to whisk into a smooth sauce.
Step 5: Glaze and Caramelize. Pull the baking sheet out of the oven—carefully, it’s hot! The sprouts should be gorgeous and crispy. Immediately drizzle the miso-sesame glaze all over them. Use a spatula or tongs to gently toss and fold the sprouts until they are evenly coated in that glossy, beautiful glaze. Spread them back out into a single layer and pop the pan back into the oven for just 3-5 more minutes. This final short blast allows the glaze to thicken, stick to the sprouts, and caramelize slightly. Watch it closely so it doesn’t burn!
Step 6: The Grand Finale. Remove the pan from the oven. Let the sprouts cool for just a minute on the pan—that glaze is molten lava hot! Then, transfer them to a serving dish and immediately shower them with the toasted sesame seeds and chopped scallions. The residual heat will wilt the scallions just slightly, which is perfect. Serve them hot and watch them disappear!
How to Serve These Shining Stars
These miso-sesame glazed Brussels sprouts are incredibly versatile! They are the ultimate sidekick to so many main dishes. I love serving them family-style in a warm, rustic bowl so everyone can help themselves. They are phenomenal alongside a simple seared salmon fillet, roasted chicken, or a pan-seared steak. For a fantastic vegetarian feast, pair them with a creamy coconut curry or a quinoa pilaf. Honestly, they’re so flavorful that I’ve been known to pile them onto a bowl of rice, top with a fried egg, and call it a glorious dinner!
Make It Your Own: Delicious Twists & Swaps
The beauty of this recipe is its adaptability. Feel free to play around!
- Spicy Kick: Add ½ – 1 teaspoon of sriracha or a pinch of red pepper flakes to the glaze for a sweet-heat situation.
- Citrus Zing: Add the zest of half a lime or a small orange to the glaze for a bright, citrusy note.
- Bacon Bliss: Because everything is better with bacon! Toss 4 slices of chopped, cooked bacon in with the sprouts during the last 5 minutes of the initial roast.
- Nutty Crunch: Swap the sesame seeds for chopped, toasted pecans or almonds for a different kind of crunch.
- Air Fryer Method: You can absolutely make these in an air fryer! Cook the oiled sprouts at 375°F (190°C) for 12-15 minutes, shaking the basket halfway, then toss with glaze and cook for another 2-3 minutes.
Anna’s Kitchen Notes
This recipe has truly evolved in my kitchen. The first time I made it, I was so eager I added the glaze at the beginning. Big mistake! The sugar in the maple syrup burned long before the sprouts were tender, leaving me with a bitter, blackened mess. Lesson learned: we roast first for crispiness, then glaze for sticky perfection. It’s a two-act process that’s worth every second.
I also have a funny memory of my then-toddler referring to these as “the yummy little cabbages” and trying to eat them all before they even made it to the table. Now, it’s one of the few green vegetables she actively requests. If that’s not a win, I don’t know what is! This dish is a testament to how a few great ingredients and a solid technique can turn the most underestimated veggie into a total superstar.
Your Questions, Answered!
Q: My glaze is very thick and doesn’t want to coat the sprouts evenly. What can I do?
A: No problem! This can happen if your miso is extra thick. Simply add a teaspoon of warm water to the glaze and whisk it in. This will loosen it up just enough to make it a perfect, drizzle-able consistency without watering down the flavor.
Q: Can I make these ahead of time for a dinner party?
A: You can do most of the work ahead! Trim and halve the sprouts a day in advance and keep them in an airtight container in the fridge. Whisk the glaze together and store it separately. When you’re ready, just roast, toss, and finish! I don’t recommend glazing and reheating them, as they will lose their wonderful crispy texture.
Q: Why is it so important to roast them cut-side down?
A> It’s all about surface area! The flat, cut side creates maximum contact with the hot baking sheet. This direct contact allows for intense heat transfer, which gives you that deep, caramelized, crispy crust we’re after. The rounded outer leaves will still get crispy, but the cut side is where the magic really happens.
Q: My sprouts are still a bit firm after 25 minutes. What gives?
A> Ovens can vary wildly, and the size of your sprouts plays a big role! If they are larger, they will need more time. If they are getting too dark on the outside but are still hard inside, simply lower your oven temperature to 400°F (200°C) and give them a bit more time. You can also toss them halfway through cooking to ensure even browning if needed.
Nutritional Information*
Per Serving (based on 4 servings):
Calories: 140 | Carbohydrates: 14g | Protein: 4g | Fat: 8g | Saturated Fat: 1g | Sodium: 320mg | Potassium: 450mg | Fiber: 4g | Sugar: 5g | Vitamin A: 855IU | Vitamin C: 96mg | Calcium: 50mg | Iron: 1.6mg
*Please note: This is an approximate estimate calculated using an online nutrition calculator. It will vary based on specific ingredients and portion sizes.
Final Thoughts: A Side Dish Worth Savoring
At the end of the day, these miso-sesame glazed Brussels sprouts prove that even the most misunderstood veggie can be transformed into the star of the table. Crispy, caramelized edges, a glossy umami glaze, and that irresistible balance of sweet, savory, and nutty make this dish unforgettable.
Whether you’re serving them alongside a holiday roast, a weeknight salmon fillet, or piling them into a rice bowl with a fried egg (my personal guilty pleasure), they bring restaurant-level flavor with hardly any fuss. This is one of those recipes that turns skeptics into believers, toddlers into sprout enthusiasts, and family dinners into “pass me another helping” moments.
So next time you’re staring down a bag of Brussels sprouts, skip the boiling pot and reach for your sheet pan instead. These little cabbages are ready for their glow-up—and once you taste them, I promise, there’s no going back.