Unroll a Little Magic: Your New Favorite Holiday Cookie Awaits!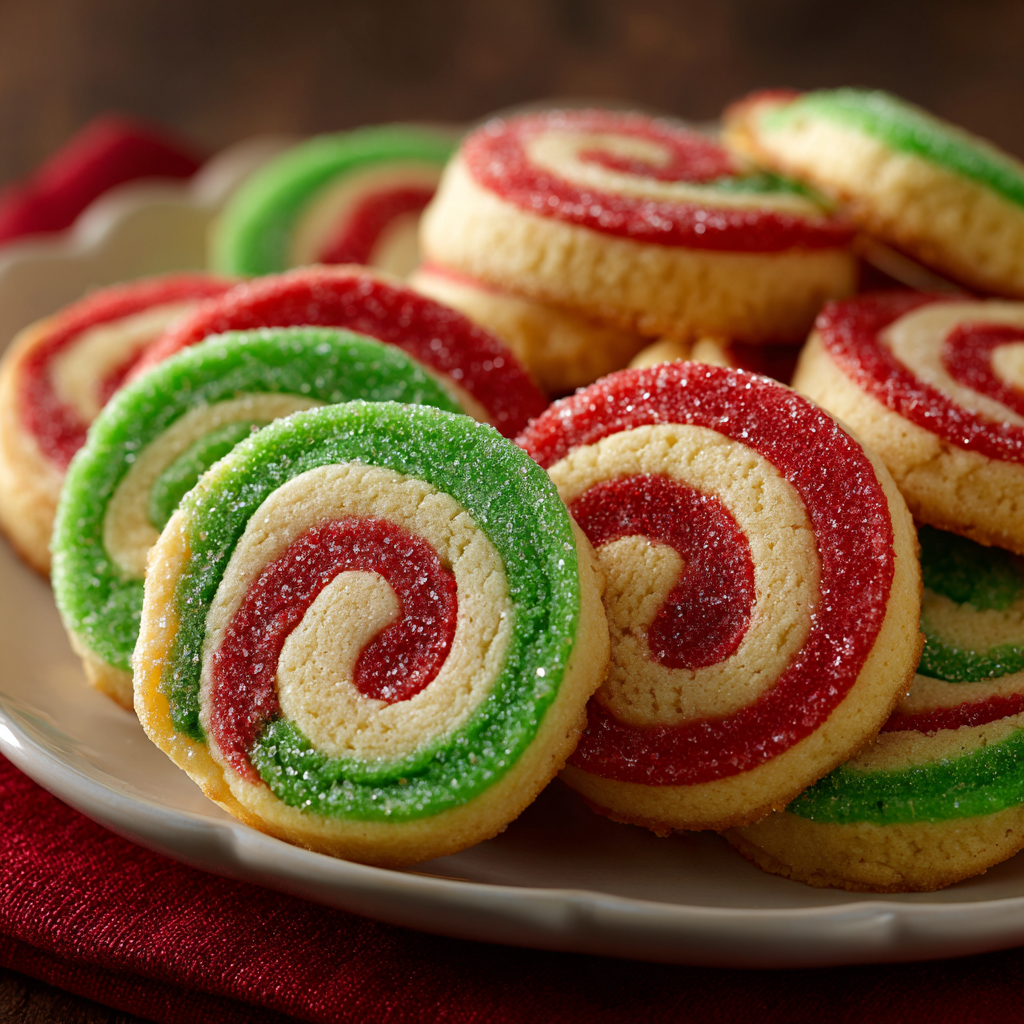
Hey there, friend! Anna here, pulling up a virtual stool next to you in my flour-dusted kitchen. Is there anything that captures the pure, unadulterated joy of the holiday season quite like a beautifully decorated cookie? I think not. But if you’ve ever looked at intricate, professional-level holiday treats and felt a tiny pang of “I could never make that,” I’m here to tell you something important: you absolutely can.
Today, we’re throwing open the doors to cookie magic that’s far easier to create than it looks. We’re making Sugar Cookie Pinwheels! These stunning, swirly, soft-buttery delights are the showstoppers of any cookie platter. With their mesmerizing red and green spirals (or any colors your heart desires!), they look like you spent hours with a tiny paintbrush. The secret? It’s all in a simple, clever roll-and-slice technique that feels like a fun kitchen craft project.
This recipe is a celebration of joy, not perfection. It’s about getting your hands a little colorful, laughing when the dough does its own wiggly thing, and feeling that burst of pride when you pull a tray of these gorgeous spirals out of the oven. They’re the perfect cookie to bake with loved ones, to package as the most heartfelt homemade gift, or to simply enjoy with a mug of hot cocoa while watching the twinkle lights glow. So, are you ready to create some edible magic together? Let’s grab our rolling pins and make something amazing!
The Year the Cookies Almost Didn’t Spin
PrintSugar Cookie Pinwheels

These eye-catching sugar cookies feature red and green swirls rolled into festive spirals that are soft, buttery, and perfect for holiday baking. Slice, bake, and watch the compliments roll in!
- Prep Time: 25 mins
- chill time: 2 hrs
- Cook Time: 10 mins
- Total Time: 2 hr 35 mins
- Yield: 32 cookies 1x
Ingredients
1 cup unsalted butter, softened
1 cup granulated sugar
1 large egg
1½ tsp vanilla extract
2½ cups all-purpose flour
½ tsp baking powder
¼ tsp salt
Red and green gel food coloring
Optional: holiday sprinkles or sanding sugar for edges
Instructions
Cream butter and sugar until light and fluffy. Add egg and vanilla; beat until combined.
Whisk flour, baking powder, and salt in a separate bowl. Gradually mix into the wet ingredients to form dough.
Divide dough into 2 equal portions.
Tint one red, one green (or any colors you love).
Knead color in gently to avoid overworking.
Roll out each colored dough between two sheets of parchment into equal rectangles (about ¼-inch thick).
Stack one sheet over the other and gently roll into a tight log. Wrap in plastic wrap.
Chill for at least 2 hours (or overnight) until firm.
Slice into ¼-inch rounds. Roll edges in sprinkles if desired.
Bake at 350°F (175°C) for 8–10 minutes, or until set but not browned.
Cool on baking sheet, then transfer to wire rack.
Nutrition
- Calories: 110
- Sugar: 6g
- Fat: 6g
- Carbohydrates: 13g
- Protein: 1g
I have to share a little story with you. The very first time I attempted these pinwheels, it was a classic holiday baking disaster in the making. I was determined to create the most picture-perfect cookies for our annual family cookie swap. I had my brand-new gel food coloring, my favorite apron on, and… I completely forgot to let my butter soften. You know where this is going.
I tried to cream rock-hard butter with sugar, and let’s just say my stand mixer protested loudly. The dough was crumbly, the colors were streaky, and when I tried to roll my “log,” it cracked like a desert floor. I almost threw the whole thing in the compost bin, convinced I’d failed. But my grandma, who was visiting, simply patted my hand and said, “Anna, darling, the best cookies are made with resilience, not just recipe.” She helped me knead in a tiny splash of milk, and we patiently warmed the dough just enough with our hands to make it pliable. They weren’t the perfect spirals I’d envisioned, but they were ours. And you know what? They were the first cookies to disappear from the platter. That day, I learned that a little kitchen hiccup and a dash of adaptability always, always leads to something delicious.
Gathering Your Cookie Art Supplies
This is my favorite, super-forgiving sugar cookie dough. It holds its shape beautifully when sliced but stays tender and soft after baking. Here’s what you’ll need to create your pinwheel masterpiece:
- 1 cup (2 sticks) unsalted butter, softened – This is non-negotiable, friends! Properly softened butter is the key to a light, fluffy dough that creams together perfectly. It should yield gently to a finger press, not be melty or oily. If you forget (like I did!), cut it into chunks and let it sit for 15-20 minutes.
- 1 cup granulated sugar – Our sweetener and part of what creates that lovely, slightly crisp edge on the baked cookie.
- 1 large egg – The binder that brings everything together. Make sure it’s at room temperature to play nicely with the butter.
- 1½ tsp pure vanilla extract – The flavor MVP! I love a good vanilla here; it gives that classic, warm sugar cookie taste. For a fun twist, you could use 1 tsp vanilla and ½ tsp almond extract.
- 2½ cups all-purpose flour – The foundation of our dough. I always fluff my flour with a spoon before scooping and leveling it off with a knife to avoid a dense, dry cookie.
- ½ tsp baking powder – Our little leavening agent that gives the cookies a gentle rise and a soft, cakey texture.
- ¼ tsp salt – The secret weapon! Salt balances the sweetness and makes all the other flavors pop. Don’t skip it.
- Red and green gel food coloring – Chef’s Insight: I highly, highly recommend gel food coloring over liquid. The gels are more concentrated, so you need less to get vibrant colors without throwing off the liquid balance of your dough. You’ll get those stunning, bold spirals without a soggy mess.
- Optional: Holiday sprinkles or sanding sugar for edges – This is the glitter on our masterpiece! Rolling the chilled log in sprinkles before slicing adds a fabulous crunchy texture and extra festive sparkle.
Let’s Create Some Swirly, Whirly Magic: Step-by-Step
Okay, let’s get our hands into it! This process is so much fun. Just follow these steps, and you’ll have a beautiful cookie log ready for its big debut.
Step 1: The Creamy Foundation
In the bowl of a stand mixer fitted with the paddle attachment (or a large bowl with a hand mixer), beat the softened butter and granulated sugar together on medium-high speed. We’re not just mixing; we’re creaming. Do this for a good 2-3 minutes, until the mixture is light, pale yellow, and wonderfully fluffy. This step incorporates air, which is what gives us a tender cookie. Scrape down the sides of the bowl with a spatula to make sure everything is getting involved in the party.
Step 2: Bringing it Together
Add the room-temperature egg and vanilla extract to the butter mixture. Beat on medium speed until everything is just combined. It might look a little curdled at first, but that’s okay! It will smooth out once you add the dry ingredients. Scrape the bowl down again—this is a good habit to ensure no hidden pockets of unmixed ingredients.
Step 3: The Dry Team
In a separate medium bowl, whisk together the all-purpose flour, baking powder, and salt. This isn’t just busywork; whisking aerates the flour and evenly distributes the leavening agents so every cookie bakes up uniformly. With your mixer on low speed, gradually add the dry ingredients to the wet ingredients. Mix until the flour is just incorporated and a soft dough forms. Chef’s Hack: Stop mixing the second you no longer see dry flour. Overmixing at this stage can lead to tough cookies, and we want tender, melt-in-your-mouth spirals!
Step 4: A Splash of Color
Divide your dough into two equal portions. I like to use a kitchen scale for precision, but eyeballing it works just fine! Place each portion in a separate bowl. Now, for the fun part! Add your gel food coloring, a few drops at a time, to each portion. I start with about 5-6 drops for a vibrant color. Use a spatula or (clean!) hands to knead the color into the dough. Pro Tip: Wear disposable gloves for this part unless you want festive green and red hands for the next day (ask me how I know!). Knead gently until the color is fully and evenly distributed.
Step 5: Roll It Out
This is the key to perfect pinwheels! Tear off two large sheets of parchment paper. Place one ball of colored dough between the two sheets. Using a rolling pin, roll the dough into a rectangle, about ¼-inch thick and as even as you can get it. The parchment paper prevents sticking without adding extra flour, which can dry out the dough. Repeat with the second colored dough. Chef’s Hack: Try to get both rectangles roughly the same size and shape—it makes the next step much easier!
Step 6: The Big Roll
Carefully peel the top layer of parchment off of one of your dough rectangles. Place the second rectangle (parchment and all) directly on top of it, then gently peel off that top layer of parchment. You should now have your two colored dough layers stacked, ready to become one. Starting from one of the longer sides, use the bottom parchment paper to help you tightly and evenly roll the dough into a log, just like you’re making a jelly roll. Don’t worry if it’s not perfect! A little wiggle is part of the charm.
Step 7: The Chill Factor
Wrap your beautiful swirly log tightly in plastic wrap. This is the most important step for clean slices! You must chill the log for at least 2 hours, or preferably overnight. This firms up the butter, making the log easy to slice and ensuring the cookies hold their gorgeous pinwheel shape in the oven instead of spreading into colorful puddles.
Step 8: Slice and Sparkle
Preheat your oven to 350°F (175°C) and line baking sheets with parchment paper. Unwrap your chilled log. If you’re using sprinkles, spread them on a plate or shallow dish. Lightly roll the outside of the log in the sprinkles, pressing gently so they adhere. Using a sharp knife, slice the log into ¼-inch thick rounds. Place them about 1 inch apart on your prepared baking sheets.
Step 9: Bake to Perfection
Bake for 8-10 minutes. The cookies are done when the centers look set and the edges are just barely beginning to show a hint of color. They should not be brown! Chef’s Secret: They will continue to firm up as they cool on the hot baking sheet. Overbaking is the enemy of a soft sugar cookie!
Step 10: The Patient Wait
Allow the cookies to cool on the baking sheet for 5 minutes before transferring them to a wire rack to cool completely. This waiting period is the perfect time to pour yourself a glass of milk because you, my friend, have just baked a masterpiece.
Presenting Your Edible Masterpiece
These cookies are a celebration all on their own! For a simple, elegant look, arrange them on a plain white platter or a rustic wooden board to let their vibrant colors truly shine. They are the ultimate cookie exchange trophy, a gorgeous addition to a holiday dessert table, or the star of your Christmas cookie box. Tuck a few into a cellophane bag tied with a ribbon for a gift that says, “I made this magic just for you.” And of course, they’re best served with a cold glass of milk, a warm cup of coffee, and a side of happy conversation.
Make It Your Own: Endless Swirl Possibilities
The fun doesn’t stop with red and green! This recipe is a blank canvas for your creativity. Here are a few of my favorite twists:
- Chocolate Swirl: Replace ¼ cup of the flour in one half of the dough with ¼ cup unsweetened cocoa powder for a stunning chocolate-vanilla pinwheel.
- Funfetti Celebration: Knead 2-3 tablespoons of colorful jimmies or nonpareils into the vanilla dough before rolling for a birthday-themed confetti explosion inside!
- Peppermint Patty: Add ½ tsp peppermint extract (instead of vanilla) to one half of the dough and use red food coloring for a refreshing, festive flavor.
- Gluten-Free Twist: Swap the all-purpose flour for a 1:1 gluten-free baking blend. The texture might be slightly more delicate, but it works wonderfully!
- “All The Sprinkles” Edge: Instead of just one color, use a mix of holiday sprinkles for a fantastically colorful and crunchy edge.
Anna’s Extra Pinches of Advice
This recipe has become a holiday staple in my home, and it’s evolved a little over the years. I’ve found that letting the dough chill overnight produces the absolute cleanest slices—it’s worth the wait, I promise! If your log cracks a little when you slice it, don’t fret. Just smoosh it back together with your fingers; it will bake up just fine and taste delicious. That’s the beauty of homemade.
One of my favorite kitchen memories is of my daughter, when she was about four, “helping” me knead the green dough. She was so focused, her little tongue sticking out, and she ended up with more green on her face than in the dough. We laughed until we cried, and now it’s a tradition that we make a “messy batch” together every year. It’s a good reminder that the real magic isn’t in the perfect spiral, but in the joy you create while making them.
Your Questions, Answered!
Q: My dough is too crumbly and won’t come together. What did I do wrong?
A: This usually happens if the butter wasn’t soft enough or if you accidentally added a bit too much flour. The fix is easy! Add a teaspoon of milk or cream at a time, kneading it in with your hands, until the dough just comes together. Be patient and add the liquid slowly.
Q: Can I make the dough log ahead of time and freeze it?
A: Absolutely! This dough freezes beautifully. Wrap the finished log tightly in plastic wrap and then a layer of aluminum foil. It will keep for up to 2 months. When you’re ready to bake, let it thaw just enough in the fridge to slice easily (usually about 30-60 minutes), then slice and bake as directed. You may need to add 1-2 minutes to the baking time.
Q: Why did my pinwheels spread and lose their shape in the oven?
A: The number one culprit is a dough log that wasn’t chilled long enough. The butter must be very firm to hold its shape. Ensure you chill for the full 2 hours, or better yet, overnight. Also, make sure your oven is fully preheated before the cookies go in!
Q: Can I use liquid food coloring instead of gel?
A: You can, but be cautious. Liquid food coloring will add extra moisture to your dough. You’ll need to use quite a bit more to achieve vibrant colors, which can make the dough sticky. If it gets sticky, you may need to add a tiny bit more flour to compensate, which can slightly alter the texture. Gels are highly recommended for the best results.
A Quick Nutritional Note
While these are definitely a treat, here’s a rough estimate per cookie (based on a yield of 32 cookies, without sprinkles): Calories: ~110 | Fat: 6g | Carbs: 13g | Sugar: 6g | Protein: 1g
Remember, the best part of baking from scratch is knowing exactly what’s in your food and sharing it with people you love. Now go on and enjoy every single buttery, swirly bite!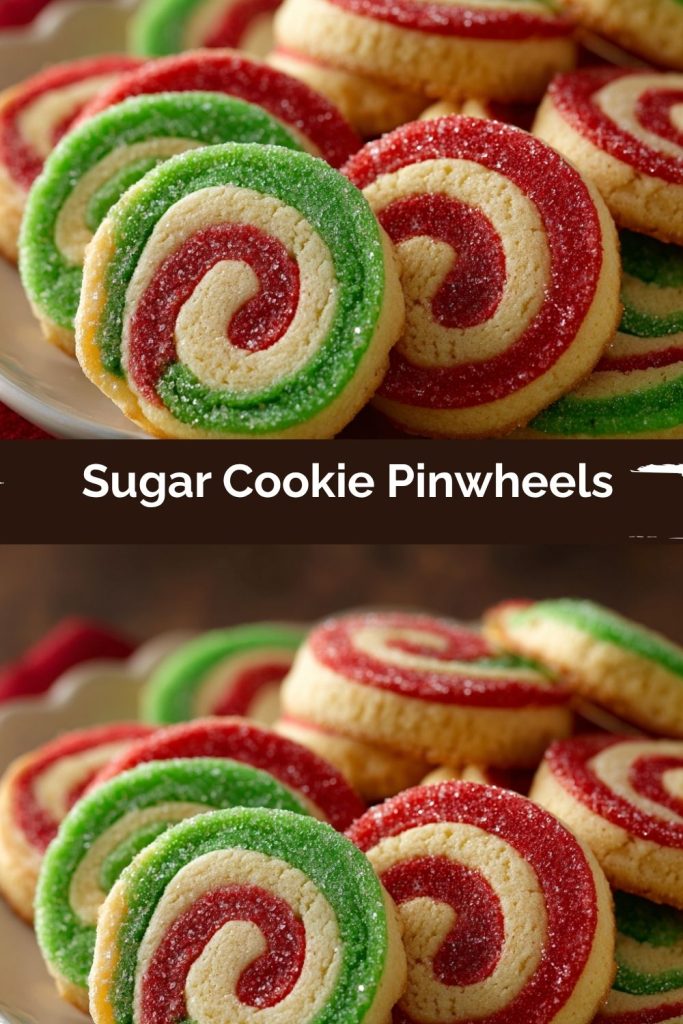
Final Thoughts
At the end of the day, Sugar Cookie Pinwheels aren’t just about pretty swirls and festive colors—they’re about slowing down, making a little joyful mess in the kitchen, and creating memories that last far longer than the cookies themselves. These buttery, colorful spirals prove that holiday baking doesn’t have to be complicated to feel magical.
So whether you’re baking them with little helpers by your side, wrapping them up for a neighbor, or simply enjoying one with your evening cocoa, let these cookies remind you that the season is about connection, laughter, and sweet little traditions. And if your swirls come out a bit wobbly? All the better—they’ll still taste like love.
Here’s to cookies that sparkle on the outside and warm your heart on the inside.